
Cracking the perfect chocolate truffle recipe doesn’t have to be a mystery. In our upcoming guide, we’ll take you on a delicious journey through two dark chocolate truffle recipes. Brace yourself for a culinary adventure you won’t forget, filled with tips, tricks, and mouth-watering results!
What’s the Buzz about Chocolate Truffles?
We all know how much a sweet, velvety chocolate truffle can hit the spot, don’t we? With a rich, soft interior and a crisp exterior, chocolate truffles are an indulgence we can’t resist. But have you ever thought about making them at home? Don’t fret. We have you covered with a recipe that’ll be a surefire hit at your next gathering or even for a simple treat-yourself moment!
Making Magic with Dark Chocolate Truffles: Version 1 (Cocoa Powder Exterior)
Ready to start? First, let’s have a look at the ingredients. And remember quality matters – don’t skimp on your chocolate!
Gather Your Ingredients
For our first version of these delectable delights, we’re keeping it classic. Here’s what you’ll need:
- 8 ounces of high-quality dark chocolate
- 1/2 cup of heavy cream
- 1 teaspoon of instant coffee (optional)
- 1 tablespoon of brandy (optional)
- Unsweetened cocoa powder for coating
Excited yet? Let’s get down to business.
Melting the Chocolate
Starting our chocolate truffle recipe, the first step is to melt your chocolate. Break the chocolate into smaller pieces, which will help it melt uniformly. Now, let’s use the double boiler method. If you don’t have a double boiler, don’t worry. Take a heatproof bowl, set it over a saucepan with simmering water, and let the chocolate melt slowly and evenly. Just remember, no water should get into the chocolate. It’s not a good mix!
Preparing the Cream Mixture
While your chocolate is melting, let’s work on the cream. In a separate saucepan, heat the cream until it just begins to simmer, then remove it from the heat. Don’t let it boil, we just want it hot enough to melt the chocolate!
The Perfect Blend: Combining the Cream and Chocolate
Next up, pour your hot cream over the melted chocolate. Stir until you have a smooth mixture. This process is known as emulsification and is crucial in achieving that dreamy texture in your truffles.
Adding a Twist: Incorporating Instant Coffee and Brandy
If you’ve chosen to include instant coffee and brandy, now’s the time to do it. Stir them in, enhancing the depth of your chocolate flavour with these extra elements.
Time to Chill: Chilling the Mixture
Once everything’s well mixed, you need to chill your mixture. Cover the bowl with plastic wrap and put it in the fridge. Patience is key here, my friends. Allow the mixture to firm up for at least 2 hours or even overnight.
The Art of Shaping: Shaping the Truffles
Once your mixture is firm, it’s time to shape your truffles. Use a small scoop or a melon baller to form your truffles, then roll them between your palms to achieve a round shape. But remember, they don’t have to be perfect – after all, real truffles found in nature are irregular!
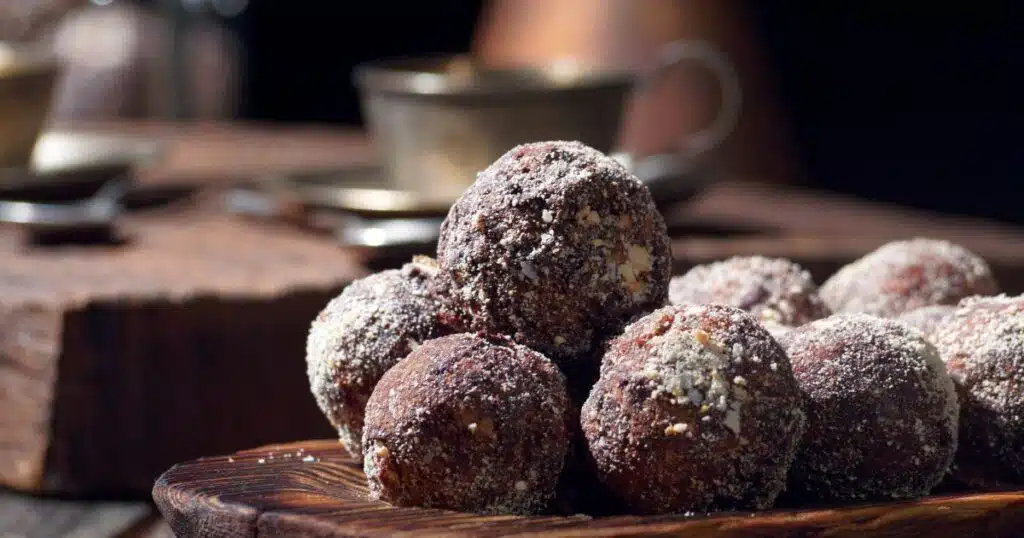
The Final Touch: Coating the Truffles with Cocoa Powder
Now, for that irresistible exterior. Roll your truffles in a dish of unsweetened cocoa powder until they’re fully coated. The contrast of the bitter cocoa powder with the sweet truffle interior is simply divine!
Patience Pays Off: Final Chilling and Serving
Finally, place your coated truffles back in the fridge to firm up. After an hour or so, they’re ready to serve. Now, don’t they look professional?
I’m sure your mouth is watering by now! So, why wait? Grab your ingredients and start creating these delicious bites of heaven. Don’t forget to share your homemade chocolate truffle experience. Happy truffle-making!
A New Adventure: Dark Chocolate Truffles Version 2 (Enrobed Truffles)
Alright, chocoholics, let’s take things to the next level! Here comes our version 2 – the delectable Enrobed Truffles. Brace yourselves, we’re about to elevate the truffle game.
Gather Your Ingredients
Here’s what you need for this new rendition of our chocolate truffle recipe:
- 8 ounces of premium dark chocolate
- 1/2 cup of heavy cream
- 1 teaspoon of butter
- Additional 6 ounces of chocolate for coating
- Cocoa powder for dusting
Now, let’s get our hands dirty (or, rather, chocolaty)!
Preparing the Cocoa Powder Base
As with version 1, our base remains essentially the same. Heat the cream till it simmers, then pour over the chopped chocolate. Stir until you have a glossy ganache. Add in your butter for an extra shine and luxurious texture.
Melting Your Desired Chocolate
Once your truffles are chilled and shaped, it’s time to prepare the coating. Melt an additional 6 ounces of chocolate using the same method as before. You can use dark, milk, or white chocolate based on your preference.
The Art of Dipping: Shaping and Dipping the Truffles
This step requires a little finesse. Get your truffles and your melted chocolate ready. Using a dipping fork or a regular fork, dip each truffle into the melted chocolate, ensuring it’s fully covered. Let the excess chocolate drip off before placing it back on the parchment paper.
Coating the Truffles with Cocoa
As an optional step, if you want that extra depth, roll your still-wet, coated truffles in cocoa powder. This adds another layer of flavour and texture that’s absolutely irresistible.
The Secret Ingredient: Achieving a Crunchy and Rich Texture
But we’re not done yet. To give our truffles a satisfying snap when bitten into, we let them rest until the outer shell hardens. This process, known as tempering, gives the truffles a shiny, hard exterior that contrasts beautifully with the soft, creamy center.
The Final Step: Serving and Enjoying
Once your truffles have set and the exterior is hard, they’re ready to be enjoyed! Serve them as they are, or for an added touch of elegance, place each truffle in a small paper cup.
A Sweet Farewell: Conclusion
And there you have it! Two versions of a classic chocolate truffle recipe, each offering a unique experience for the palate. Whether you prefer a traditional cocoa powder exterior or an enrobed truffle, the joy of making your own decadent truffles is unmatched.
To further enhance your truffle-making skills, consider attending truffle-making classes in Hamilton or Toronto. These classes provide hands-on instruction from experts in the field, helping you master the art of truffle-making. From ingredient selection to perfecting the tempering process, you’ll learn invaluable techniques to elevate your truffles.
Happy making, and even happier eating!
Frequently Asked Questions
What Makes a Chocolate Truffle?
A chocolate truffle is a type of chocolate confectionery traditionally made with a chocolate ganache center coated in chocolate, cocoa powder, or chopped toasted nuts. The ganache is typically made from a mixture of chocolate and cream.
Which Chocolate is Best for Truffles?
For the most indulgent truffles, opt for high-quality dark chocolate with a cocoa content of at least 60-70%. However, if you prefer a sweeter taste, high-quality milk chocolate can also work well.
How to Dip Truffles in Chocolate Perfectly?
The trick is to use a dipping fork or a regular fork and be patient. Dip each truffle into the melted chocolate and ensure it’s fully covered, then allow the excess to drip off before setting it back on your work surface.
What Can You Substitute for Heavy Cream in Truffles?
You can substitute heavy cream with a variety of options depending on your dietary preferences. Options include full-fat coconut milk for a vegan version or a mix of butter and milk for a non-vegan alternative.
What Happens If You Use Heavy Cream Instead of Milk in a Recipe?
Using heavy cream instead of milk in a recipe will result in a richer, thicker, and creamier outcome due to its higher fat content. In the case of chocolate truffles, it would make them even more decadent.